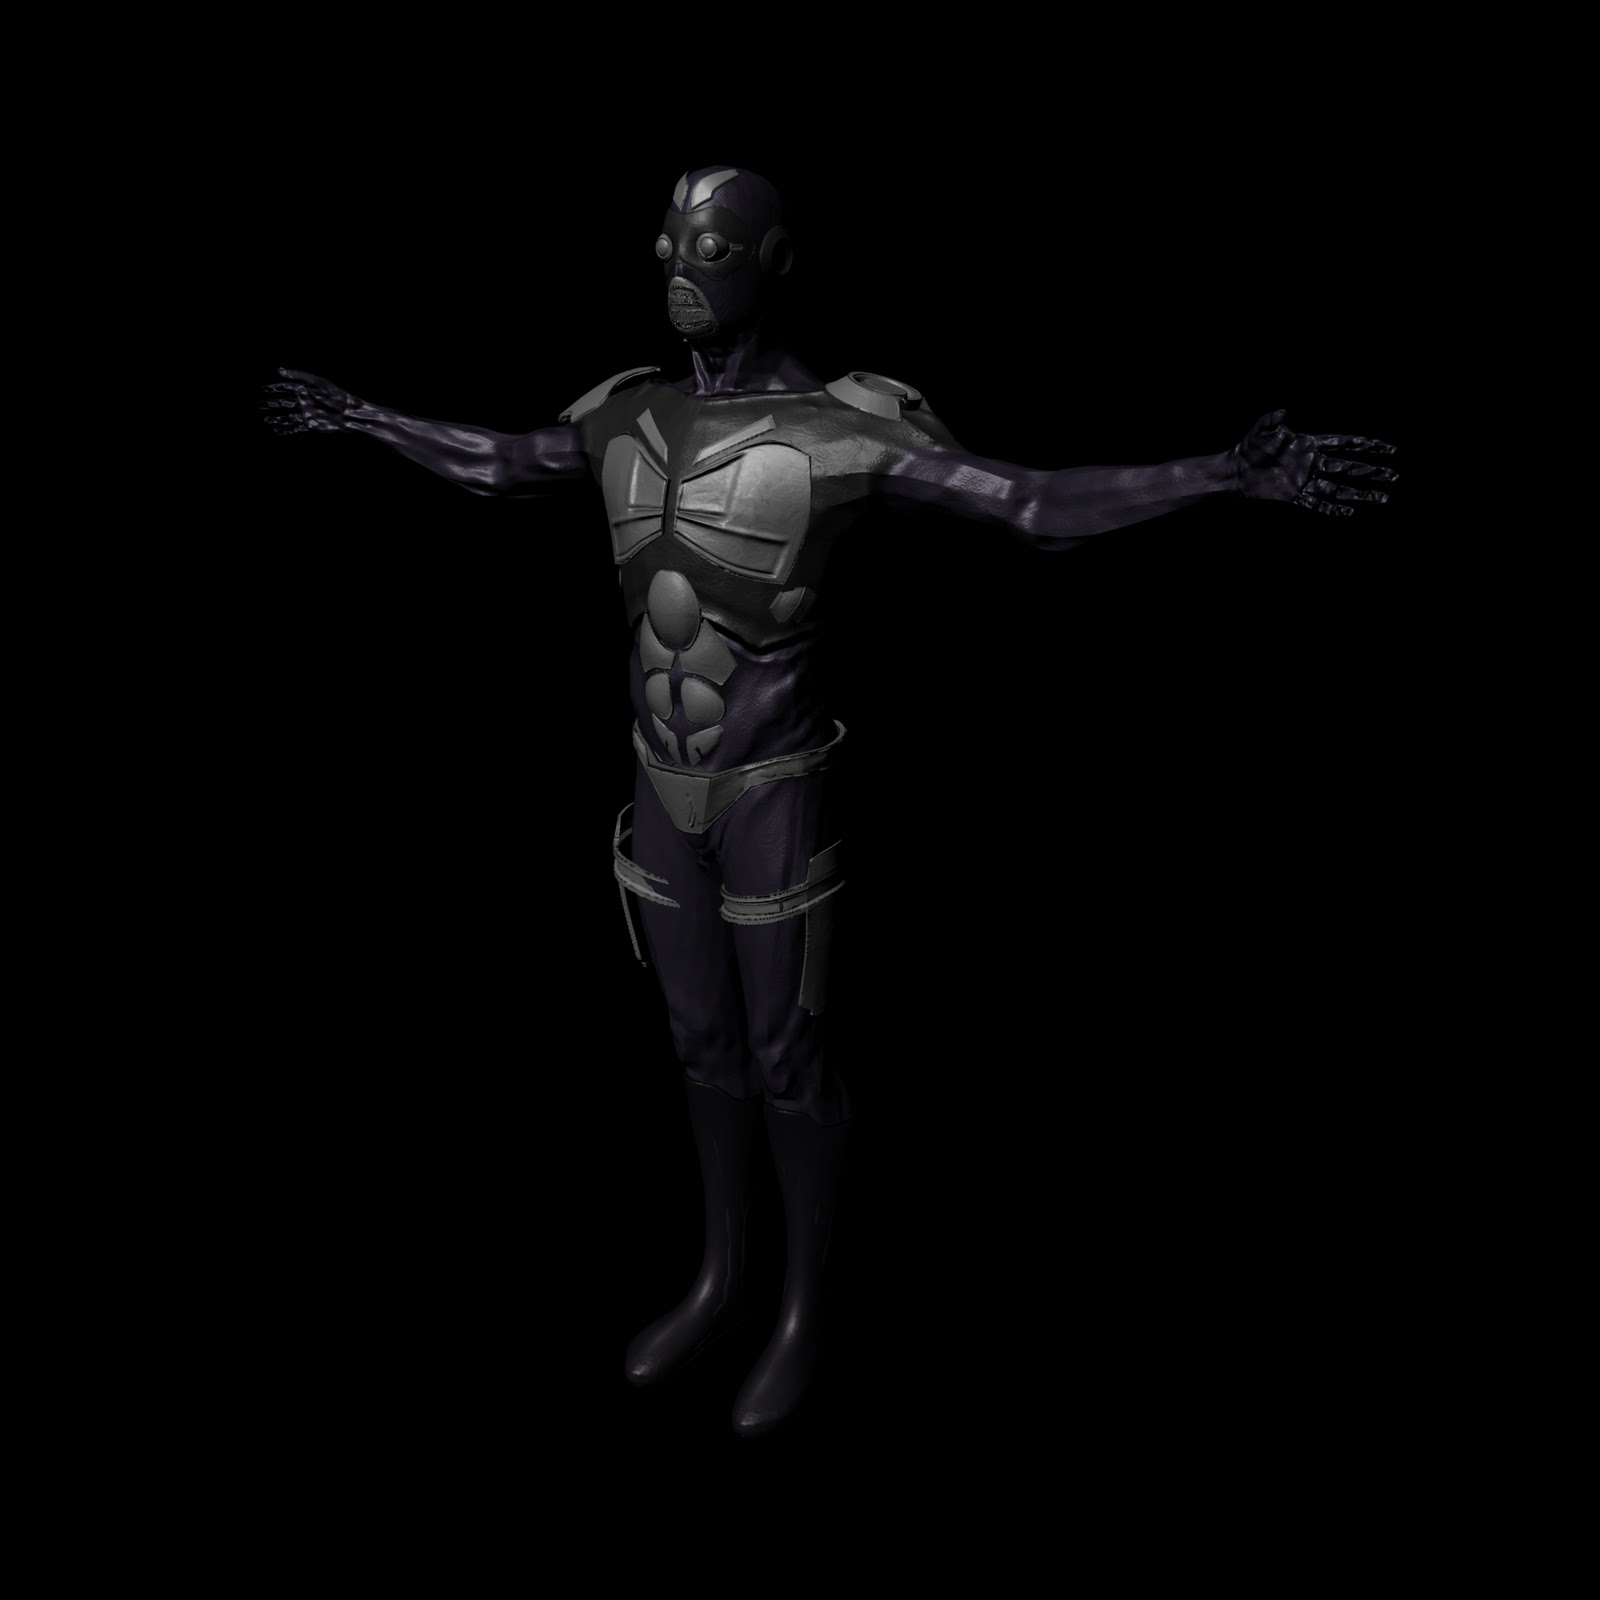
Thursday, 30 December 2010

Post Processing - Render Layers

Just some tests with basic objects to enchnace and develope visuals in post production. I rendered out 4 layers a master layer, ambient occlusion, shadows, and glow layer and compostied in after effects.


process


original


post

Wednesday, 29 December 2010

Z-Depth Compsiting Tests

 Just a quick one, been doign lots of learnign in preperation for the stages so heres my firts little test for zdepth in post - just created usign a renderlayer for zdepth and in after effects.

No Depth


Depth

Tuesday, 21 December 2010

Render fixed :)

Finally fixed the render problems after alot of failed methods and googling. heres the link i foudn the soloution at on ZbrushCentral : - http://www.zbrushcentral.com/showthread.php?t=58020

Heres my succesfull but very low quality render with both objects! using mental ray!

Turns out maya tesslation didn't like, somethign zbrush did to the objects when they were imported so it messed it all up, had to use maya's mesh clean up for it to work.

RE: - Diagnositic

I tried usign a tutorial by Scott Spencer, to convert my texture to .map files, and re-apply them to my sculpted layer. however i get the same errors:

MENTAL RAY RENDER DIAGNOSTICS:
Performance
- LowPoly_Guard_2GuardPartsSmoothed_obj:ZBrushDispMap has a resolution of 2048x2048 which may be inefficient.
- LowPoly_Guard_2GuardPartsSmoothed_obj:ZBrushNormalMap has a resolution of 2048x2048 which may be inefficient.
- LowPoly_Guard_2GuardPartsSmoothed_obj:ZBrushTexture has a resolution of 2048x2048 which may be inefficient.
- ZBrushDispMap has a resolution of 2048x2048 which may be inefficient.
- If ZBrushDispMap is not a memory mappable file, use imf_copy to convert it to .map format, to improve the performance.
- ZBrushNormalMap has a resolution of 2048x2048 which may be inefficient.
- If ZBrushNormalMap is not a memory mappable file, use imf_copy to convert it to .map format, to improve the performance.
- ZBrushTexture has a resolution of 2048x2048 which may be inefficient.
- If ZBrushTexture is not a memory mappable file, use imf_copy to convert it to .map format, to improve the performance.
// Warning: 9 warnings, see script editor for details. //
// Error: Nothing is currently selected. //

Mental Ray - Render Diagnosis

MENTAL RAY RENDER DIAGNOSTICS:
Performance
- GuardPartsSmoothed_obj_ZBrushDispMap has a resolution of 2048x2048 which may be inefficient.
- If GuardPartsSmoothed_obj_ZBrushDispMap is not a memory mappable file, use imf_copy to convert it to .map format, to improve the performance.
- GuardPartsSmoothed_obj_ZBrushNormalMap has a resolution of 2048x2048 which may be inefficient.
- If GuardPartsSmoothed_obj_ZBrushNormalMap is not a memory mappable file, use imf_copy to convert it to .map format, to improve the performance.
- GuardPartsSmoothed_obj_ZBrushTexture has a resolution of 2048x2048 which may be inefficient.
- If GuardPartsSmoothed_obj_ZBrushTexture is not a memory mappable file, use imf_copy to convert it to .map format, to improve the performance.
- GuardPolyPaint1_ZBrushDispMap has a resolution of 2048x2048 which may be inefficient.
- If GuardPolyPaint1_ZBrushDispMap is not a memory mappable file, use imf_copy to convert it to .map format, to improve the performance.
- GuardPolyPaint1_ZBrushTexture has a resolution of 2048x2048 which may be inefficient.
- If GuardPolyPaint1_ZBrushTexture is not a memory mappable file, use imf_copy to convert it to .map format, to improve the performance.
- ZBrushDispMap has a resolution of 2048x2048 which may be inefficient.
- If ZBrushDispMap is not a memory mappable file, use imf_copy to convert it to .map format, to improve the performance.
- ZBrushNormalMap has a resolution of 2048x2048 which may be inefficient.
- If ZBrushNormalMap is not a memory mappable file, use imf_copy to convert it to .map format, to improve the performance.
- ZBrushTexture has a resolution of 2048x2048 which may be inefficient.
- If ZBrushTexture is not a memory mappable file, use imf_copy to convert it to .map format, to improve the performance.
// Warning: 16 warnings, see script editor for details. // 


Im going to try this imf_copy stuff and creat .map files, see if that will let me render multiple objects!

Mental Ray vs maya software

As ive looked at before somethign strange is happening when i try to redner in mental ray with multiple objects. This is a screencap of my maya screen followed by the render usign mental ray.


 The screen cap of Maya, both the base mesh, and the extra objects with all map applied.


The render using mental ray.


The render using maya software. Althought the object both render, the displacement map, doesn't really work with maya software. The other problem is it takes abotu 13.25 times longer. this render took 1 mintue 46 seconds. the mental ray render took 8 seconds!

Problems with mulitple objects in maya rendering

Over recnet weeks, after orignally testing, exporting low poly meshes from zbruhs with maps, and rendering fine, why all of a sudden im strugglign to render some of my sculpts. For example i can't render the guard mesh, with displacement and normal maps, on fine, but add the extra parts as another object, they don't render.

I accident;y swithced to a maya software redner, and all of a sudden, both objetcs render. I think it has something to do with mental ray memory allocation.

This is something to experiment with!

Guard Poly-Painted/ basic texturing

Heres a quick render of my guard with a basic texture on, done with zbrushes, projecton tol and ZAppLink, intot photoshop.

Too Normal map, or not too normla map, that is the question!

I've been playign with normal maps on top of my displacmenet, maps, and heres what i've got.

The picture bleow is without a normal map.
Using a basic render, no new lights etc.


The picture below this is with the normal map ontop of the displacrement.


I think that witht he normla maps, adds some of the nicer fine, detail in the sculpt, and hardly chnages the render tiem at all.

Monday, 13 December 2010

Timetabling

Some timetbalign i would like to addhere too, especially the redering time, which i am giving a month to do, as it will be intense to render epscially if i use redner passes. I am also enteraintign the idea of usign the uni as a render farm if i need to in order to finish the renders.

This is a gant chart to timetable my efforts:


This is my excel data too:


Tasks Date Start Duration (Days) Date End


Storyline ideas 01/09/10 14 15/09/10
Scripting sequences 12/09/10 5 17/09/10
Concept Sketches 12/09/10 14 26/09/10
Character Designs 12/09/10 10 22/09/10
Research 01/09/10 190 10/03/11
Reference Gathering 01/09/10 153 01/02/11
Final Character Designs 22/09/10 7 29/09/10
Character Model Sheet 29/09/10 3 02/10/10
Character Modelling 22/09/10 90 21/12/10
Final Concept Art 17/09/10 20 07/10/10
Modelling 22/09/10 115 15/01/11
Rigging 21/12/10 15 05/01/11
Unwrapping / UV'ing 21/12/10 5 26/12/10
Texturing 26/12/10 14 09/01/11
Sculpting  30/09/10 82 21/12/10
Animatic 01/12/10 7 08/12/10
Storyboarding 08/12/10 9 17/12/10
Rig Tests 21/12/10 15 05/01/11
Animation Tests 15/01/11 10 25/01/11
Animation 05/01/10 45 19/02/10
Learning 01/09/10 200 20/03/11
Environment/Set Building 01/12/10 25 26/12/10
Lighting 26/12/10 50 14/02/11
Setting up Camera angles 26/12/10 50 14/02/11
Render Tests 14/02/11 7 21/02/11
Playblasting 14/02/11 5 19/02/11
Rendering 19/02/11 30 21/03/11
Grading Images 15/03/11 9 24/03/11
Compositing Sequences 21/03/11 5 26/03/11
Add any Visual Effects 21/03/11 5 26/03/11
Test Render Piece 25/03/11 1 26/03/11
Test Render on projector 25/03/11 5 30/03/11
Grade piece for projection 25/03/11 5 30/03/11
Final Piece Exports 30/03/11 1 31/03/11
Report 01/09/10 211 31/03/11
Feasibility Report 17/12/10 40 26/01/11

Main Character Zbrush Sculpt Progress

This is me playign Zbrush's inbuilt turntable fucntions. I have put the rendering up to best quality and am using a Light brown material. This is a sculpt of main character so far on highest divisions. I haven't sulpoted the legs as theres going to  be a independant mesh on there for his trousers. This is mainly a muscle, sulpt. All the finishign detsails such as pores, wirnkles are still to be done.

Main Character Sculpt Video Link

Guard 3D Progress

This is the progress so far on my guard charcter. Its all UV'd and sculpted. Just some work on the chest plate to go, then i will move onto poly painitng the texture. Rigging to start.


Animatic

I have made an animatic for my presenation. Its also for me to understand what i am actually goign to make. It gives a realsitic sense of time, and rough outline of camera angles and such. Of ocurse some changes may occur during production, espically with camera angles etc, hoiwever its nice to get a overall look and feel for what i am making.

Animatic Link

Displacement Map Tests

I have been playign with displacement maps, from Zbrush to Maya, its so i can add lots of details to my characters, but still rig the low poly mesh, makign it easier to work with and render. Its been a bit of a struggle. I followed a tutorial from Gnomon Workshop from 2008, however, it wouldn't work proeprly. In the end after a lot of research i found this article by Scott Spencer and very renowed Zbrush artisit: http://www.pixologic.com/docs/index.php/Scott_Spencer,


After that it became much easeir to do:
This is a screen in maya, its a low poly mesh with a displacement map for rendering


This is the render, not all high settings: - 22 seconds to render with displacment maps on and glow on the eyes.

Playing with poly painting in Zbrush

This is a test i did using a standard Zbrush model of a dog. I UV'd it using UV Master, then used the poly painting function in zbrush to paint my texture colours onto a diffuse texture map. I then export the model, and textures into Maya to test if i could render it.


Comparisions

These two shots aree very similar. the first is from the fifthc element, and the second is my own animatic sketch.


The next shots represent the sirens goign of in my control room, which i imagine is goign to look something liek the two pictures form picth black.


Reference Materials

 Azureus Rising - a fully CG aniamtion mad e as a pitch for full feature length funding. Its such a sbeautfilly render peice, i woul dlove to make my renders anywhere near this quality. I have taken alot of insipration from this short. Its grading with hues of blue i think will suit some of my shots. I also got some ideas for the guard from the glowing blue eyes and bits. See the full video: http://www.youtube.com/watch?v=agk2svo7svI

 Fifth Element, has  some brillant designs in it which i have found very inspiring. I have also taken some inpriation from the esscape in teh first 10 minutes of the film.
 This shot from the fifth element is very similar to one of my shots in my cinematic.Comparison in my next post.
 Killzone 2 - killzone, uses alot of the elements i love in its production. It has this lovely steampunk desing, in a a not so far in the future world. This is very simialr to my concept. It also uses less satured overly coloures shot s of green which i think will look good in some of my darker shots.
 The matrix is a huge inspiration to many people. I love the matrix's concept and desing. I have love the grading of the film wiht its greens, blue,s and blacks.

 These shots from pitch black are almost exactly what i imagine my flash red sirens in the control will look like.


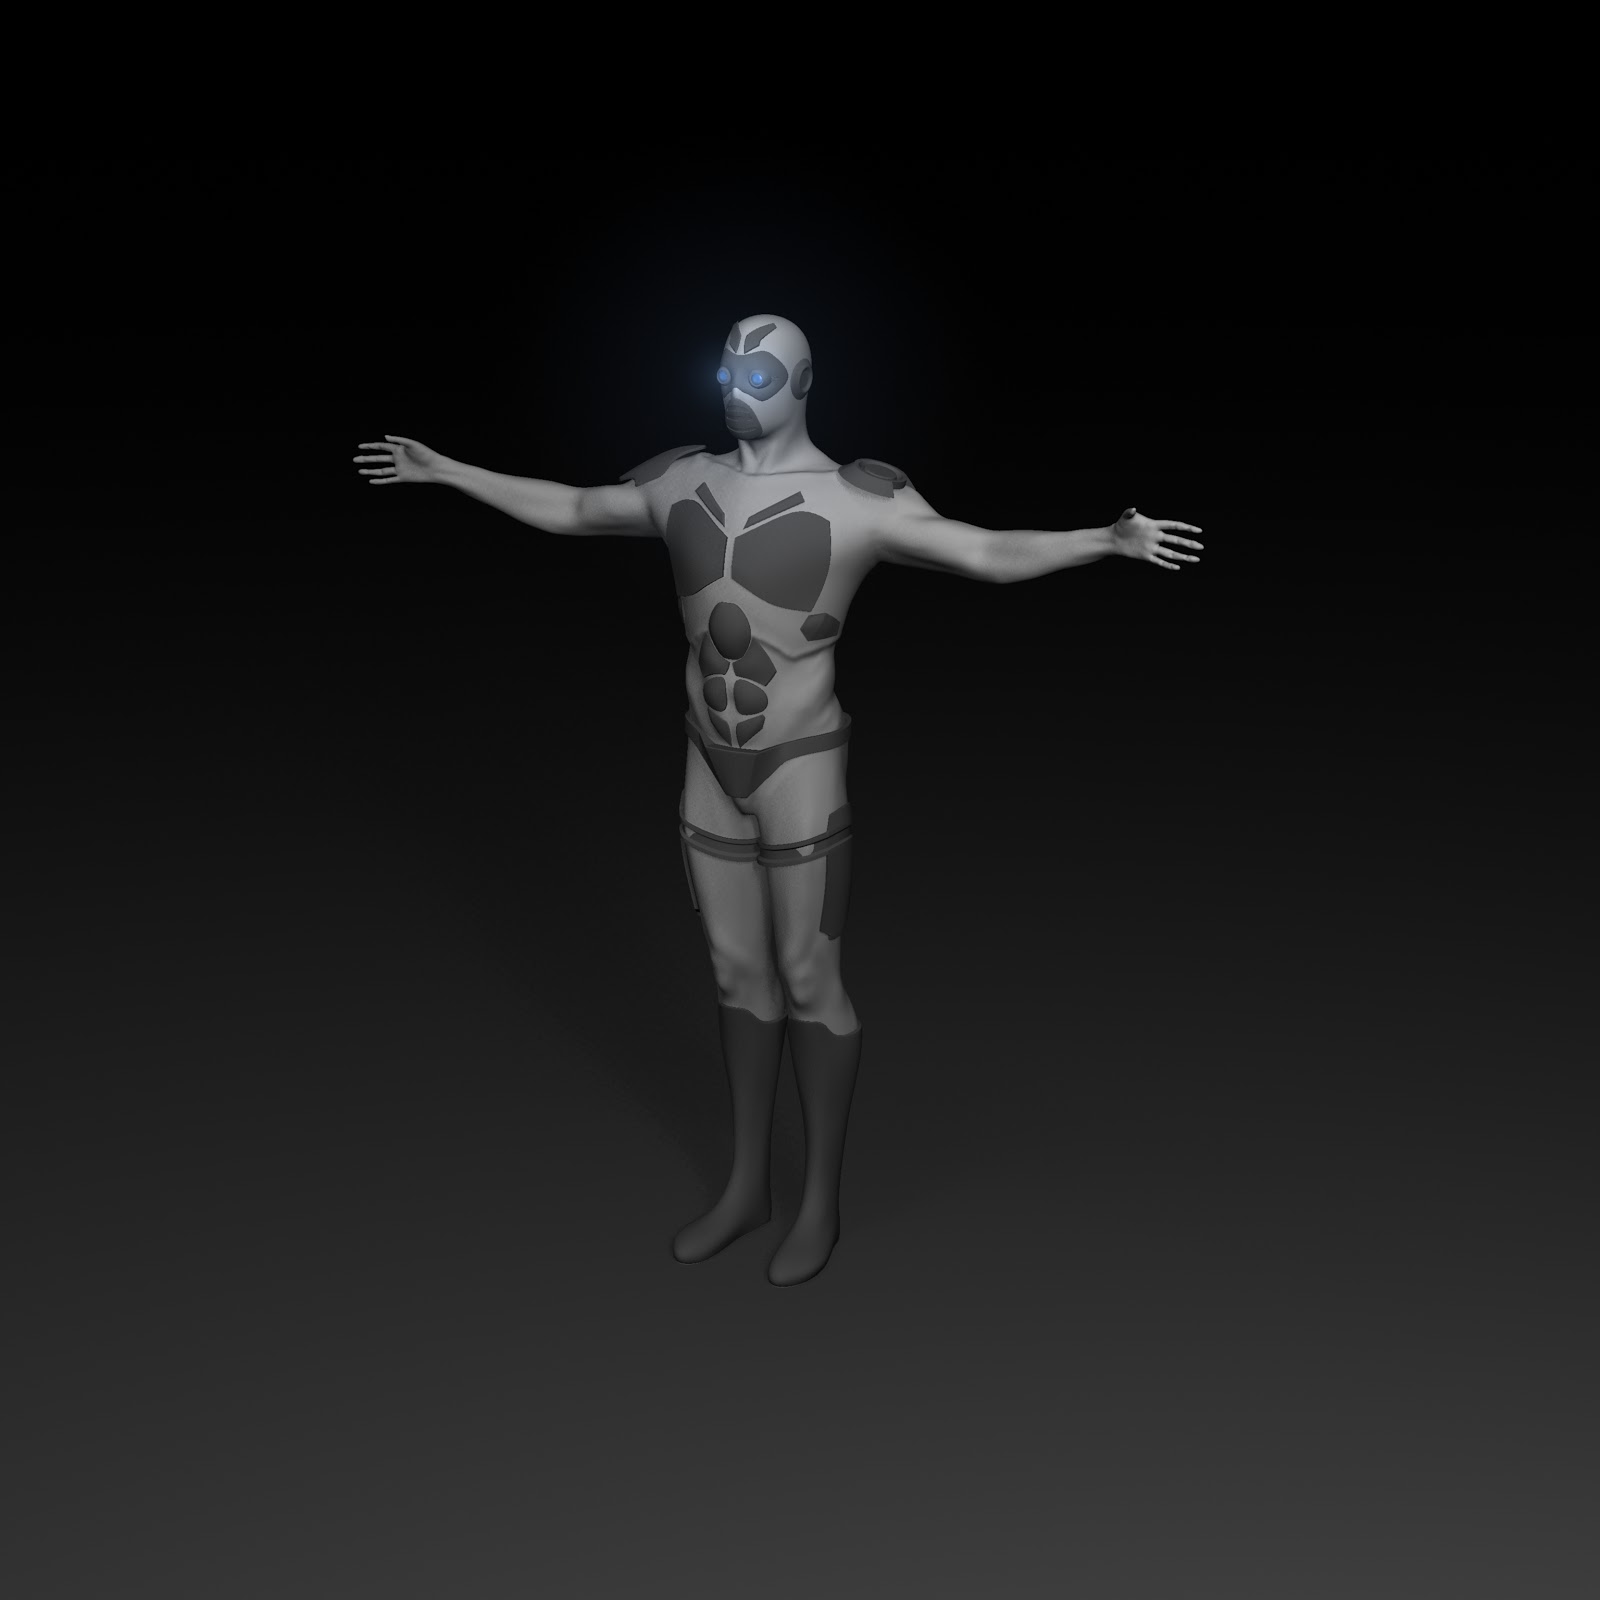
The Lighting in this shot is somethign similar to what i want in most of my shots. with strong contrasts whihc as to the atmosphere of the shot.
 The X-Men is a big influence in my idea. The story of mutants wiht strange abilites,a nd being outcasts in society is a idea i love, and am adopitng the mutagenic idea for my own main charcter who burst out bone spikes aroudn his joints.
 

Concept Art Paintings

Two painted, photoshop concept art peices. Playing with colour considerations for bother characters. I have decided that the guard looks good with the blues and greys. I am still considering, the colours, for the main characters trousers. I might wait till its in 3D to play more with his colours.


Main Charcter Concept Art

These are my final sketches, for my main character. He has had a few changes since I first imagined him. Originally I wanted my character to be a much leaner character, but still very ripped. I wanted to get over his quick, and agile nature. However, after playing with some storyboards, I thought giving him a much bigger frame like a body builder, would give him a much more menacing silhouette, especially in the dark shadows, I want to frame him in at the begging of the cinematic.


I was also inspired by the sheer size and speed of actor Terry Crews in White chicks and The Expendables.

Guard Concept Artwork

Here is my final drawing of my Guard Character. There is a front view for reference in Maya for modelling purposes aswell.

Concept Art

Rough Concept Artwork for my final project, playign with forms and styles.


Thursday, 18 November 2010

A Rough outline of possible camera cuts/ script esque rough


Sirens pierce the pitch black sky. Lights highlight the contours of a towering prison of steel and concrete.
Camera pans from up the spiralling tower.
Camera pans through the concrete wall along a dark corridor and catches up with a guard walking along holding a gun in his right hand.
Camera falls through the floor and slows, focusing on the pan down steel bars of a prison cell.
Out of focus a silhouette of a man sat on a bed.
A light from outside flashes across the window highlighting the side of the man’s face, his black pupil looks up directly towards the camera.
Camera cuts to a walking guard and focuses on dangling key card
The silhouette sinks into the blackness of his cell
The guard looks into the cell searching for the prisoner. He turns to face the camera, suddenly strong hands shoot out from the cell and snap the guard’s neck, and he tumbles to the ground.
Macro shot of a hand with hard thorns extruding from the knuckles picking up the card and putting it into the slot on the cell door.
The prisoners open the door and stretches slowly and expertly, before running into the corridor into the darkness.
Three guards are storming along the corridors, Technological advancement AK-47’s raised to the eye level lighting up with a built in light on top. A movement further ahead catches the eye.
Suddenly the prisoners leap from the wall and dives towards the guards. His body suddenly explodes with thorns all over. The prisoner punches a guard as the other two fire into the guards back missing the prisoner (bullet time effect? Techno bullets). The prisoner throws his arm and two thorns launch towards the guards piercing there small armour and they tumble to the ground bleeding.
Cut to the camera at the top of the tower. The silhouette stands on the top with one foot on the ledge.
He swan dives from the tower and the camera follows him facing upwards towards his face. His body accelerates till it passes the camera and fades to black.


Story (The Basics)

This is a rough wirte up in a more short story style, this is the very basics of my idea:


Sirens pierce the pitch black of night. Spotlights scatter through the dark skyline searching for the unknown.
 Inside the prison of steel and concrete Smith strolls casually along the dark corridor lit by low orange glowing lights. Walking with a slow, powerfully stride holding his AK-97 across his body like a medal of honour. With every stride a hint of metal jingles menacingly amplified by the endless cold concrete surroundings. Smith looked from left to right slowly and casually, checking each miniature cell as he passed.
Slowing, with an almost indecipherable unease, the guard peers cautiously into the cell on his left. In focusing pass the rusting solid steel bars into the blackness. The silence is aminous. Smith leans closer towards the cell with an unnerving slowness. Slowly taking in the empty cell Smith jerks upright and turns raising his left hand to his chest to press the ‘mic’ button on his console. Suddenly the guard is pulled backwards connecting with solid bars. Strong hands move sharply holding his helmet. Then SNAP! Smith’s lifeless body crumbles into a heap on the floor.
The strong hands grope the body searching for the metallic key card around his neck. A chirpy beep sounds as blue flash fills the room. The cell door screeches protesting as a dark silhouette forces it open. The silhouette moves into the corridor with a graceful movement and stretches expertly and with an unnatural quickness sprints into the distance.
The control room suddenly a blaze with sirens and a dark crimson flashing. Three guards stumble to their feet grabbing there side arms from the desk. With movements so smooth they must have been practiced for years the guards fall into a triangular formation, moving swiftly along the dark corridors. Sweeping expertly from side to side, lighting the way with equipped UV torches attached to the view finders of their standard AK-97rifles. The guards slow as they approach block J, creeping forwards placing one front slowly in front of the other.
In the distance a almost inaudible scrape catches the guards alert. They snap towards the sound. A hand is raised. The lead guard steps forward. Focusing through his aiming circle. Sirens scream. Out of the darkness, leaping comes the prisoner. His body quakes as it falls and explodes with horrible dark bone coloured thorns all over his body. A face with eyes as black as the night hurtles towards the lead guard frozen in the fear. The prisoner forces the guard to the ground and with his unnerving quickness picks up the body like a ragdoll as the two guards open fire. Shielding himself with the now limp body of the guard he moves forwards as the guard begin to retreat. A loud click echoes. The corner of the prisoners lip curl upwards in a sinister smile. The limp body of the lead guard tumbles to the floor and with a large sweeping motion the prisoner forces his arm across his body launching two large thorns straight into the guards’ jugglers. They collapse grasping their throats as a river of blood pours onto the concrete floor.
The prisoner glides easily over the pile of body’s disappearing into the darkness in silence.


Decisions

I have decided to base my animation short on a short story i wrote a few years back. I think i have a sytrong enough idea of the concept style that will help me produce a nice looking piece. And i think i have learned enough basic techniques and alot of self research technqiues to pull off making a short 30 second animation.

The animation should be quick paced, and convey a story in a short time. It should be atmospheric, using dark contrasting lighting to add mood and style.